






Showing posts with label CT. Show all posts
Showing posts with label CT. Show all posts
March 19, 2015
PTU Tutorial ~ Sweet Spring


Written: 3/19/15
I used PSP XI to write this tutorial
You must have basic knowledge of PSP
Scrap Kit: Sweet Spring by Kizzed by Kelz
Tube: Easter by Nocturne
Font: Earthbound
Plugins: None
New canvas 600*600
Open 99 - copy/paste - resize 80% - position to your liking
Open tube - copy/paste - resize and postion to your liking
Open 8 - copy/paste - resize 70% - position to your liking
Open 4 - copy/paste - resize 35% - position to your liking
Open 3 - copy/paste - resize and flip - position to your liking
Open 34 - copy/paste - resize 15% - position to your liking
Open 88 - copy/paste - resize 65% - position to your liking
Add copyright, license and name
Save as png
March 15, 2015
PTU Tutorial ~ Sew Pretty


Written: 3/15/15
I used PSP XI to write this tutorial
You must have basic knowledge of PSP
Scrap Kit: Sewing Room by Angel Wing Scraps
Tube: Camea by Selisan AI Giab
Font: Postcard From Mars
Plugins: None
New canvas 600*600
Open 76 - copy/paste - resize 60% - position to your liking - use your magic wand to select the inside of your frame - expand by 8 - new layer - open paper 13 - copy/paste into selection - select none
Open tube - copy/paste - resize as desired - duplicate - move one layer above your frame and erase any bits you want
Open paper 11 - copy/paste into background layer - open mask of choice - use new mask layer - from image - apply - merge group
Open 53 - copy/paste - resize 40% - position to your liking
Open 24 - copy/paste - resize 35% - position to your liking
Open 8 - copy/paste - resize 50% - position to your liking - drop shadow
Open 71 - copy/paste - resize 43% - position to your liking - rotate to your liking
Open 58 - copy/paste - resize 38% - mirror - position to your liking
Open 36 - copy/paste - resize 25% - position to your liking
Open 41 - copy/paste - resize 25% - position to your liking
Add copyright, license and name
Save as png
March 10, 2015
PTU Tutorial ~ Red and The Wolf


Written: 3/10/15
I used PSP XI to write this tutorial
You must have basic knowledge of PSP
Scrap Kit: Ruby & The Wolf by Irish Princess Designs
Tube: Red Riding Hood by Laguna
Font: Magnolia Light
Plugins: None
New canvas 600*600
Open Frame2 - copy/paste - resize 60% - position to your liking - use your magic wand to select the inside of your frame - expand by 5 - new layer - open paper 13 - copy/paste into selection - select none
Open tube - copy/paste - resize as needed - position to your liking - drop shadow
Open Moon - copy/paste - resize 85% - position to your liking
Open Gramma's House - copy/paste - resize 70% - position to your liking
Open Lantern - copy/paste - resize 45% - position to your liking
Add copyright, license and name
Save as png
March 9, 2015
PTU Tutorial ~ Music Of The Night


Written: 3/9/15
I used PSP XI to write this tutorial
You must have basic knowledge of PSP
Scrap Kit: Music Of The Night by Irish Princess Designs
Tube: Letters by Nocturne
Font: Beast Of Avalon
Plugins: None
New canvas 600*600
Open 88 - copy/paste - resize 65% - position to your liking - use your magic wand to select the inside of your frame - expand by 9 - new layer - open paper 10 - copy/paste into selection - select none
Open tube - copy/paste - resize 40% - position to your liking - drop shadow
Open 64 - copy/paste - do not resize - position to your liking
Open 23 - copy/paste - resize 45% - position to your liking
Open 24 - copy/paste - resize 25% - position to your liking
Open 36 - copy/paste - resize 45% - position to your liking
Open 52 - copy/paste - do not resize - position to your liking
Open 62 - copy/paste - resize 48% - position to your liking
Open 100 - copy/paste - resize 45% - position to your liking
Add copyright, license and name
Save as png
March 8, 2015
PTU Tutorial ~ Simplicity

Written: 3/8/15
I used PSP XI to write this tutorial
You must have basic knowledge of PSP
Scrap Kit: Simplicity by Inzpired Creationz
Tube: Christina by Denis Prenzel
Font: Falling Rain
Plugins: None
New canvas 600*600
Open Frame_1 - copy/paste - resize 65% -position to your liking - use your magic wand to select the inside of your frame - expand by 8 - new layer - open paper _1 - copy/paste into selection - select none
Open tube - copy/paste - place under your frame and position to your liking - use your magic wand to select the inside of your frame - expand by 8 - invert - select your tube and delete - select none
Open Butterflies_1 - copy/paste - do not resize - position to your liking
Open Cat_1 - copy/paste - resize 50% - position to your liking
Open Mask_2 - copy/paste - resize 40% - position to your liking
Open Doodle_3 - copy/paste - resize 88% - position to your liking
Open Dress_1 - copy/paste - resize 75% - postiont to your liking - drop shadow
Open Violin_1 - copy/paste - resize 60% - position to your liking
Open Roses_3 - copy/paste - resize 45% - position to your liking
Open Shoe_1 - copy/paste - resize 35% - position to your liking - drop shadow
Add copyright, license and name
Save as png
February 25, 2015
PTU Tutorial ~ Fleur


Written: 2/25/15
I used PSP XI to write this tutorial
You must have basic knowledge of PSP
Scrap Kit: Midnight Sparkle by Irish Princess Designs
Tube: Fleur by Nocturne
Font: Nella Sue Demo
New canvas 600*600
Open Frame2 - copy/paste - resize 75% - position to your liking - use your magic wand to select the inside of your frame - expand by 8 - new layer - open paper 2 - copy/paste into selection - select none
Open tube - copy/paste - position to your liking - use your magic wand on your frame - expand by 8 - invert - select your tube - delete - select none - duplicate - Gaussian Blur - Radius 4 - Layer Property: Hard Light - Select your Original tube layer and set Opacity to around 77

Open fullsize tube - copy/paste - resize and position to your liking
Open Leaves - copy/paste - do not resize - position to your liking
Open Chest - copy/paste - resize 40% - position to your liking
Open Clock - copy/paste - resize 30% - position to your liking
Open Flower1 - copy/paste - resize 30% - position to your liking
Open Hourglass - copy/paste - resize 35% - position to your liking
Open Violin - copy/paste - resize 60% - position to your liking - drop shadow
Open Swans - copy/paste - resize 35% - position to your liking - drop shadow
Open Tower - copy/paste - resize 75% - position to your liking - drop shadow
Add copyright, license and name
Save as png
PTU Tutorial ~ Glitz

Written: 2/25/15
I used PSP XI to write this tutorial
You must have basic knowledge of PSP
Scrap Kit: Glitz by Inzpired Creationz
Tube: Gold Babe Year by Arthur Crowe
Font: Karine aime les Chocolats
Plugins: None
New canvas 600*600
Open Frame_3 - copy/paste - resize 65% - position to your liking - use your magic wand to select the inside of your frame - expand by 6 - new layer - open paper 6 - copy/paste into selection - select none
Open fullsize tube - copy/paste - resize 65% - position to your liking - drop shadow
Open paper 14 - use your magic wand to select your background layer of your canvas - copy/paste paper into selection - select none - open mask of choice - use new mask layer - from image - select the name of your mask - apply - merge group - position to your liking
Open Chair_1 - copy/paste - resize 85% - position to your liking
Open Car_2 - copy/paste - resize 60% - position to your liking
Open Fan_1 - copy/paste - resize 50% - position to your liking
Open Money_1 - copy/paste - resize 45% - position to your liking
Open Rose_1 - copy/paste - resize 62% - position to your liking
Open Cosmetics_3 - copy/paste - resize 48% - position to your liking
Open Rose_2 - copy/paste - resize 48% - Mirror - position to your liking
Add copyright, license and name
Save as png
February 21, 2015
PTU Tutorial ~ Moonlight

Written: 2/21/15
I used PSP XI to write this tutorial
You must have basic knowledge of PSP
Scrap Kit: Moonlight by Inzpired Creationz
Tube: NewYear's 2013 by Keith Garvey
Font: Hall Of Fame
Plugins: None
New canvas 600*600
Open Frame 2 - copy/paste - resize 68% - position to your liking - use your magic wand to select the inside of your frame - expand by 18 - new layer - open paper 10 - copy/paste into selection - select none
Open paper 8 - use your magic wand to select your backgorund layer of your canvas - copy/paste paper into selection - select none - open mask of choice - use new mask layer - from image - apply - merge group - position to your liking
Open fullsize tube - copy/paste - resize and position to your liking - drop shadow
Open close up tube - copy/paste - position to your liking under your frame - use your magic wand on the inside of your frame - expand by 18 - invert - select your tube layer - delete - select none
Open Bridge_1 - copy/paste - resize 45% - positon to your liking
Open Butterflies 1 - copy/paste - resize 65% - position to your liking
Open Mirror_1 - copy/paste - do not resize - position to your liking - drop shadow
Open Cluster 1 - copy/paste - resize 38% - position to your liking
Open Flower 1 - copy/paste - resize 50% - position to your liking
Open Leaves 1 - copy/paste - resize 40% - position to your liking
Open Grass_2 - copy/paste - resize 40% - position to your liking
Add copyright, license and name
Save as png
February 19, 2015
PTU Tutorial ~ Life Changes

This tutorial is my creation, any resemblance to any other is coincidence and not intentional
Written: 2/19/15
Written: 2/19/15
I used PSP XI to write this tutorial
You must have basic knowledge of PSP
Scrap Kit: Life Changes by Rieneke Designs
Tube: Veronica by Denis Prenzel
Font: L'antre du Caniche
Plugins: None
New canvas 600*600
Open element5 - copy/paste - resize 70% - position to your liking - use your magic wand to select the inside of your frame - expand by 11 - new layer - open paper 5 - copy/paste into selection - select none
Open paper10 - use your magic wand on your background layer of your canvas - copy/paste paper into selection - select none - open mask - use new mask layer - from image - apply - merge group
Open tube - copy/paste - position to your liking - use your magic wand on your frame - expand by 11 - invert - select your tube layer - delete - select none - duplicate - Gaussian Blur - Radius 2 - Layer Property:Lighten

Copy/paste tube - resize 35% - position to your liking - drop shadow
Open element19 - copy/paste - resize 78% - position to your liking
Open element51 - copy/paste - resize 65% - position to your liking
Open element1 - copy/paste - resize 47% - position to your liking - drop shadow
Open element68 - copy/paste - resize 43% - position to your liking
Open element32 - copy/paste - resize 32% - position to your liking
Open element39 - copy/paste - resize 30% - position to your liking
Open element6 - copy/paste - resize 30% - position to your liking
Open element43 - copy/paste - resize 28% - position to your liking
Add copyright, license and name
Save as png
February 15, 2015
PTU Tutorial ~ Forever Love


Written: 2/15/15
I used PSP XI to write this tutorial
You must have basic knowledge of PSP
Scrap Kit: Forever Love by Inzpired Creationz
Tube: Melissa by Alehandra Vanhek
Font: Love & Trust
Plugins:None
New canvas 600*600
Open Frame_1 - copy/paste - resize 78% - position to your liking - open paper 2 - copy/paste under frame - delete excess
Open tube - copy/paste - resize 40% - position to your liking - drop shadow
Open Doodle_3 - copy/paste 90% - position to your liking - duplicate - flip - position to your liking
Open Roses_1 - copy/paste - resize 35% - position to your liking
Open Pillow_1 - copy/paste - resize 37% - position to your liking
Open Wordart_5 - copy/paste - resize 75% - position to your liking - drop shadow
Open Box_1 - copy/paste - resize 36% - position to your liking
Add copyright, license and name
Save as png
February 14, 2015
PTU Tutorial ~ My Zombie Valentine

Written: 2/14/15
I used PSP XI to write this tutorial
You must have basic knowledge of PSP
Scrap Kit: Collab kit by MMeli Crea Designz, matching the tube
Tube: Bianca Smiley by Freya Langford - Sidebottom (Smiley Creations Exclusive)
Font: Zombie Morning
New canvas 600*600
Open Frame 1 - copy/paste - resize 75% - position to your liking - use your magic wand to select the inside of your frame - expand by 8 - new layer - open paper 2 - copy/paste into selection - select none
Open paper 3 - use your magic wand to select the background layer or your canvas - copy/paste paper 3 into selection - select none - open mask of choice - click over on your paper background layer - use new mask layer - from image - apply - merge group - position to your liking
Open fullsize tube - copy/paste - resize 75% - position to your liking - drop shadow
Open Element40 - copy/paste - resize 35% - position to your liking
Open Element45 - copy/paste - resize 25% - position to your liking
Open Element97 - copy/paste - resize 30% - position to your liking
Open Element39 - copy/paste - resize 20% - position to your liking
Open Element111 - copy/paste - resize 50% - position to your liking - drop shadow
Open Element67 - copy/paste - resize 35% - position to your liking
Open Element57 - copy/paste - resize 25% - position to your liking
Open Element120 - copy/paste - resize 28% - position to your liking - drop shadow
Add copyright, license and name
Save as png
February 12, 2015
PTU Tutorial ~ Potion


Written: 2/12/15
I used PSP XI to write this tutorial
You must have basic knowledge of PSP
Scrap Kit: Potion by Niqui Designs
Tube: Potion by Alehandra Vanhek
Font: Mf Queen Leela
Plugins:None
New canvas 600*600
Open element 12 - copy/paste - resize 78% - position to your liking - use your magic wand to select the inside of your frame - expand by 6 - new layer - open paper 9 - copy/paste into selection - select none
Use your magic wand to select your background layer - open paper 10 - copy/paste into selection - select none - open mask of choice - use new mask layer to apply your mask - merge group
Open tube - copy/paste - resize as needed - position to your liking - use your magic wand to select the inside of your frame - expand by 6 - invert - choose your tube layer and delete - select none - duplicate - Gaussian Blur - Radius 6 - Layer Properties : Hard Light - choose your original tube layer - set Opaciaty to 93
Copy/paste - resize and position to your liking - drop shadow
Open element 7 - copy/paste - resize 84% - position to your liking
Open element13 - copy/paste - resize 60% - position to your liking
Open element 8 - copy/paste - resize 60% - position to your liking - drop shadow
Open element 6 - copy/paste - resize 35% - position to your liking - drop shadow
Open element59 - copy/paste - resize 28% - position to your liking
Open element70 - copy/paste - resize 40% - position to your liking
Open element64 - copy/paste - resize 40% - position to your liking
Open element48 - copy/paste -resize 30% - position to your liking
Add copyright, license and name
Save as png
February 10, 2015
PTU Tutorial ~ Love Me Tender

Written: 2/10/15
I used PSP XI to write this tutorial
You must have basic knowledge of PSP
Scrap Kit: Love Me Tender by Kizzed by Kelz
Tube: Sweet Heart by Arthur Crowe
Font: Vidok FY
Plugins:None
Items used from kit:
New canvas 600*600
Open 108 - copy/paste - resize 75% - position to your liking - use your magic wand to select the inside of your frame - expand by 3 - new layer - open paper 13 - copy/paste into selection - select none
Open paper 4 - use your magic wand to select your background layer of your canvas - copy/paste paper into selection - select none - open mask of choice - select your paper layer again - use new mask layer - from image - select name of mask - apply - merge group
Open close up tube - copy/paste under frame - resize as desired - position to your liking - use your magic wand to select the inside of your frame - expand by 3 -invert - select your tube - delete - select none - duplicate - Gaussian blur - Radius 7 - Layer Properties : Hard Light - select your original tube layer - set opacity to 81

Open fullsize tube - copy/paste - resize 60% - position to your liking - drop shadow
Open 26 - copy/paste - resize 35% - position to your liking
Open 70 - copy/paste - resize 32% - position to your liking
Open 46 - copy/paste - resize 30% - position to your liking
Open 97 - copy/paste - resize 25% - position to your liking - drop shadow
Open 64 - copy/paste - do not resize - position to your liking - drop shadow
Add copyright, license and name
Save as png
February 8, 2015
PTU Tutorial ~ Goddess

Written: 2/8/15
I used PSP XI to write this tutorial
You must have basic knowledge of PSP
Scrap Kit: Matching scrapkit by Lysiras Graphic World
Tube: Rhiannon by Jose Cano **COMING SOON**
Font: Rainy Wind
Plugins: None
Items used from kit:
New canvas 600*600
Open Element 13 - copy/paste - resize 72% - position to your liking - use your magic wand to select the inside of your frame - expand by 7 - new layer - open paper 08 - copy/paste into selection - select none
Open close up tube - copy/paste - resize 50% - position to your liking - use your magic wand to select the inside of your frame - expand by 7 - invert - select your tube - delete - select none - set opacity to 65
Open fullsize tube - copy/paste - resize 57% - position to your liking - drop shadow
Open Paper 07 - use your magic wand to select the background layer of your canvas - copy/paste paper into selection - select none - open mask of choice - choose your background layer - new mask layer - from image - apply - merge group
Open Element28 - copy/paste - resize 33% - position to your liking - drop shadow
Open Element23 - copy/paste - resize 35% - position to your liking
Open Element18 - copy/paste - resize 40% - position to your liking
Open Element26 - copy/paste - resize 23% - position to your liking
Open Element17 - copy/paste - resize 45% - position to your liking - drop shadow
Open Element05 - copy/paste - resize 50% - position to your liking
Add copyright, license and name
Save as png
February 2, 2015
PTU Tutorial ~ Puppy Love

Written:2/2/15
I used PSP XI to write this tutorial
You must have basic knowledge of PSP
Scrap Kit: Puppy Love by Inzpired Creatonz
Tube: Sweet Doll by Arthur Crowe
Font: Scribble Script
Plugins: None
Items used from kit:
New canvas 600*600
Open Frame 5 - copy/paste - resize 75% - position to your liking - use your magic wand to select the inside of your frame - expand by 5 - new layer - open paper 15 - copy/paste into selection - select none
Open close up tube - copy/paste under frame - use your magic wand to select the inside of your frame - expand by 5 - invert - select your tube layer and delete - select none - duplicate - Adjust - Blur - Gaussian Blur - Radius : 10 - Layer property : Hard Light - Opacity - 89

Open fullsize tube - copy/paste - resize 50% - position to your liking - drop shadow
Open paper 9 - select background layer of your canvas with your magic wand - copy/paste paper into selection - select none - open mask of choice - use new mask layer on your paper layer of your canvas - select from image - apply - merge group
Open Gifts 1 - copy/paste - resize 50% - position to your liking
Open Heart 3 - copy/paste - resize 40% - position to your liking
Open Puppy 3 - copy/paste - resize 45% - mirror - position to your liking
Open Wordart 3 - copy/paste - resize 55% - position to your liking - drop shadow
Open Roses 1 - copy/paste - resize 40% - position to your liking
Add copyright, license and name
Save as png
January 26, 2015
PTU Tutorial ~ Fairy Tale Princess

Written: 1/26/15
I used PSP XI to write this tutorial
You must have basic knowledge of PSP
Scrap Kit: Dancing Princess by Kizzed by Kelz
Tube: Cindy Babe by Arthur Crowe
Font: Fairy DustB
Plugins: None
New canvas 600*600
Open 14 - copy/paste - resize 75% - position to your liking - use your magic wand to select the inside of your frame - expand by 6 - new layer - open paper 5 - copy/paste into selection -select none
Open close up tube - copy/paste under frame - use your magic wand to select the inside of your frame - expand by 6 - invert - select your tube and delete - duplicate - Gaussian blur - Radius 10 - Layer Property : Hard Light - Select your original tube layer - Set opacity to 59

Open fullsize tube - copy/paste - resize 68% - position to your liking - drop shadow
Open paper 9 - select the background layer of your canvas with your magic wand - copy/paste paper into selection - select none - open mask of choice - select your paper layer in your canvas - layers - new mask layer - from image - choose the name of your mask - apply - merge group
Open 26 - copy/paste - resize 42% - position to your liking - drop shadow
Open 23 - copy/paste - resize 40% - position to your liking - drop shadow
Oepn 27 - copy/paste - resize 40% - position to your liking - drop shadow
Open 82 - copy/paste - resize 35% - position to your liking - drop shadow
Open 54 - copy/paste - resize 38% - position to your liking - drop shadow
Open 28 - copy/paste - resize 30% - position to your liking - drop shadow
Add copyright, license and name
Save as png
January 25, 2015
PTU Tutorial ~ Good 4 You


Written: 1/25/15
I used PSP XI to write this tutorial
You must have basic knowledge of PSP
Scrap Kit:2015 Good 4 You matching kit
Tube: 2015 Good 4 You by Ismael Rac
Plugins:None
Items used from kit:
New canvas 600*600
Open 19 - copy/paste - resize 60% - position to your liking - use your magic wand to select the inside of your frame - expand by 8 - new layer - open paper 1 - copy/paste into selection - select none
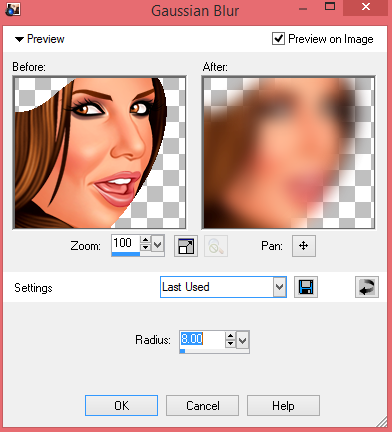
Open tube - copy/paste under frame - use your magic wand to select the inside of your frame - expand by 8 -invert - select your tube and delete - select none - duplicate - Gaussian blur - Radius 8 - apply - Layer Property - Darken
Open tube - copy/paste - resize and position to your liking - drop shadow
Open paper 7 - select bottom layer in your tag with your magic wand - copy/paste paper into selection - select none - open mask of choice - select background again - layer - new mask layer - from image - select your mask - apply - merge group
Open 15 - copy/paste - resize 48% - position to your liking
Duplicate - mirror
Open 10 - copy/paste - resize 43% - position to your liking
Open 8 - copy/paste - resize 40% - position to your liking - dropshadow
Open 2 - copy/paste - resize 33% - position to your liking
Add copyright, license and name
Save as png
January 24, 2015
Mushroom Fairy Tags


January 20, 2015
PTU Tutorial ~ Angel Of Darkness

Written: 1/20/15
You must have basic knowledge of PSP
Scrap Kit: Angel of Darkness by Toxic Desirez
Tube: Dark Fairy by Ismael Rac
Font: Ballpoint Scratch
Items used from kit:
New canvas 600*600
Open Frame 1 - copy/paste - resize 76% - position to your liking - use your magic wand to select the inside of your frame - expand by 8 - New layer - open paper 8 - copy/paste into selection - select none
Open close up tube - copy/paste - position to your liking - use your magic wand to select the inside of your frame - invert - select tube - delete - select none
Duplicate - Hard Light - select original layer - Gaussian Blur - Radius 8

Open full size tube - copy/paste - resize as needed - position to your liking - drop shadow
Open Paper 1 - resize 600*600 - open mask of choice - apply using new mask layer - merge group - copy/paste - position to your liking
Open Thorned Rose & Heart - copy/paste - resize 50% - position to your liking
Open Skulls & Rose - copy/paste - resize 50% - position to your liking
Open Eyeball - copy/paste - resize 36% - positio to your liking
Open Cross - copy/paste - resize 36% - position to your liking
Open Rose & Skull - copy/paste - resize 42% - position to your liking
Open Scythe - copy/paste - resize 42% - position to your liking
Open Candy 1 - copy/paste - resize 50% - position to your liking
Add copyright, license and name
Save as png
January 18, 2015
PTU Tutorial ~ Plum Passion

Written: 1/18/15
I used PSP XI to write this tutorial
You must have basic knowledge of PSP
Scrap Kit: Plum Passion by Irish Princess Designs
Tube: Mikaella by Tony T
Font: Vivaldi
Plugins: None
Items used from kit:
New canvas 600*600
Open 9 - copy/paste - resize 75% - position to your liking - use your magic wand t select the inside of your frame - expand by 10 - New layer - open paper 1 - copy/paste into selection - select none
Open paper 9 - resize 600x600 - open mask of choice - select your paper - new mask layer - merge group - copy/paste - position to your liking
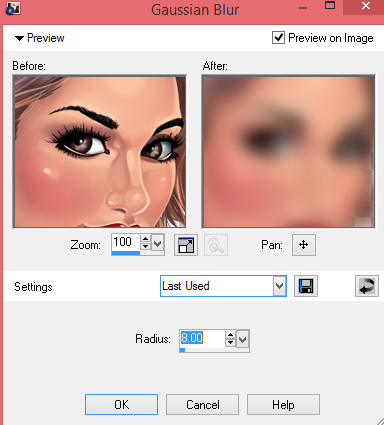
Open close up tube - copy/paste - position to your liking - use your magic wand to select the inside of your frame - invert - select tube - delete - duplicate - Gaussian Blur - Radius : 8 - Layer Property : Hard Light
Open full size tube - copy/paste - resize as needed - position to your liking - drop shadow
Open 7 - copy/paste - resize 35% - position to your liking
Open 100 - copy/paste - resize 45% - position to your liking
Open 89 - copy/paste - do not resize - position to your liking
Open 94 - copy/paste - do not resize - position to your liking
Open 83 - copy/passte - resize 40% - position to your liking
Open 84 - copy/paste - resize 85% - position to your liking
Open 80 - copy/paste - position to your liking - duplicate - mirror
Open 58 - copy/paste - resize 50% - position to your liking
Add copyright, license and name
Save as png
Subscribe to:
Posts
(Atom)
I CT For





CU4CU License


